09|2023
Today, we are talking about how to properly administer your own GLP-1 medications from home. We talked about these medications in last month’s blog, which you should definitely check out first!
After your initial consultation here at the clinic, we will show you how to use these medications, which will be delivered to you at home. You can save this page for reference, or I highly recommend you check out our video on Youtube here.
Preparation
So the things that you’re going to need are your vial, a syringe, and an alcohol pad. All of that should have come directly to you. So the first thing we’re going to do is open our alcohol pad and we are going to clean off the top of our bottle.
Now, why do we do that? Once this vial has been open, it has been exposed to air and germs. So there could be germs on top of the bottle that we don’t want to get in the vial because what is inside the vial is considered sterile. So we wipe the top of our bottle off with our alcohol pad.
Filling the Syringe
Uncap your insulin syringe but be careful, they’re tiny little needles. Syringes can come in a variety of sizes– the one in our sample video is a 5.0 ml syringe, and I demonstrate how to draw 2. 5mL. You will draw the appropriate amount for your dosage once we get to that step.
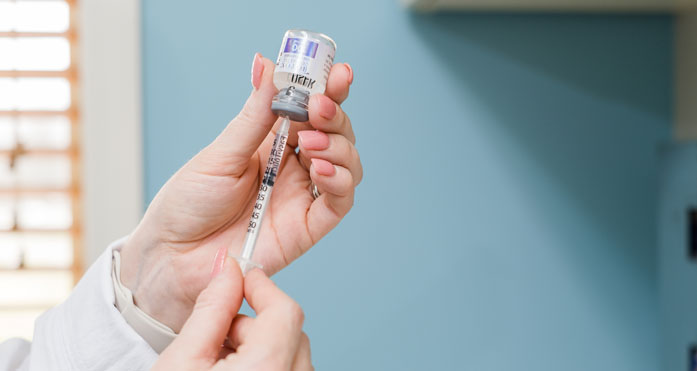
Before we draw any liquid, we’re going to hold the needle perpendicular to the bottle and go straight in to the center of the bottle where the little circle is. Once in the vial, you’re going to invert it, which means to turn it upside down. Keep everything held together very firmly.
You need to learn how to hold the vial with your index finger, middle finger and thumb, so, again, I highly recommend checking out our video listed above. You’re going to be holding all of this in one hand so you can use the other hand to draw the liquid into the syringe. Go very slowly and gently pull back on the needle plunger until you get the appropriate units for the dosage.
Now, if there is any air in your syringe that you need to get rid of, very gently, kind of tap it with your finger. Don’t hit it really hard because you’re going to bend your needle doing that. Sometimes you need to pull back a little bit more and then push back up to your measurement marker. But once you get to the units that you need, you’re just going to take the vial and pull it straight up off your syringe.
Ready to go?
You can either lay it on the alcohol pad or recap the needle. Most of the time we don’t recap needles. However, this needle hasn’t been used, so there’s no risk of contamination and putting the cap right back on it is a safe way to hold it until you’re ready to inject it.
Injection
So when you’re giving these injections, they are subcutaneous (SQ) injections, meaning they need to stay in the fatty tissue. Most people do them in the abdomen, about two inches away from the belly button. Rotate sites. If you’re having someone else do it, they can use the back part of your arm or you can give it in the leg. You just need to be sure that you’re staying in the subcutaneous tissue and you’re not getting into the muscle tissue.
This medication is meant to work in the SQ. If you get it into the muscle, it won’t be as effective. Once you’ve picked your spot, you’re going to take your alcohol pad and you’re going to clean off the spot that you’re going to inject.
We are going to uncap our needle and, if you’re doing this on yourself, you’re going to kind of pinch up a little bit of skin in between your fingers. And when you do this, it needs to go straight in. You don’t tilt it at any angle because of how small these needles are. It needs to go directly into the skin.
Also, as you’re pushing the needle in, don’t have your finger on the plunger because you could accidentally push the medication in before the needle is all the way in. So, you’re going to push the needle straight in. If you have two hands and can do it, you can stabilize the needle with one hand or you can just move your finger back and push all the medication in at a slow, steady rate.
Give it a second or two to make sure all the medicine came out and then pull straight back out. This needle is then ready to be disposed of in a proper sharps container. Typically, we do not recommend recapping now because this has actually been inside someone and so it could have some blood and body fluids on it.
Conclusion
That is how you appropriately give a SQ injection. Typically after injections, you shouldn’t bruise or bleed. These things can happen on occasion, but it’s rare. You may have a little redness or irritation at the injection site, which is why we recommend rotating the site. If you have any questions or you would like to get involved in our weight loss membership program, you can reach us at (270) 629-6722.
We are on Facebook, Instagram and Tik Tok! Give us a follow!
Thanks and we hope you have a great day.
Watch today’s video & subscribe to our monthly newsletter for news, special offers, events, and more!
Sign-up: http://eepurl.com/ilJzjw
• • •
Follow us on social media:
Instagram: @jacksonhealth_wellnessclinic
Facebook: fb.com/jacksonhealthandwellness
☎️ (270) 629-6722
📧 jacksonclinic@jacksonhealthandwellness.com
📍 102 Physicians Blvd, Ste B, Glasgow, KY

